
Customer Groups let you define customer segments once and reuse them across all B2B modules. Instead of configuring “who sees this discount” separately on every rule, you create a group like “B2B Gold” with its audience scope, then attach wholesale rules, volume rules, and Quick Order forms to that group.
Example: Create a group called “Distributors” targeting customers tagged distributor, then attach a wholesale rule (25% off the catalog), a volume rule (bulk tiers for case packs), and a Quick Order form. All three share the same audience — change the group’s targeting once, and every attached rule updates automatically.
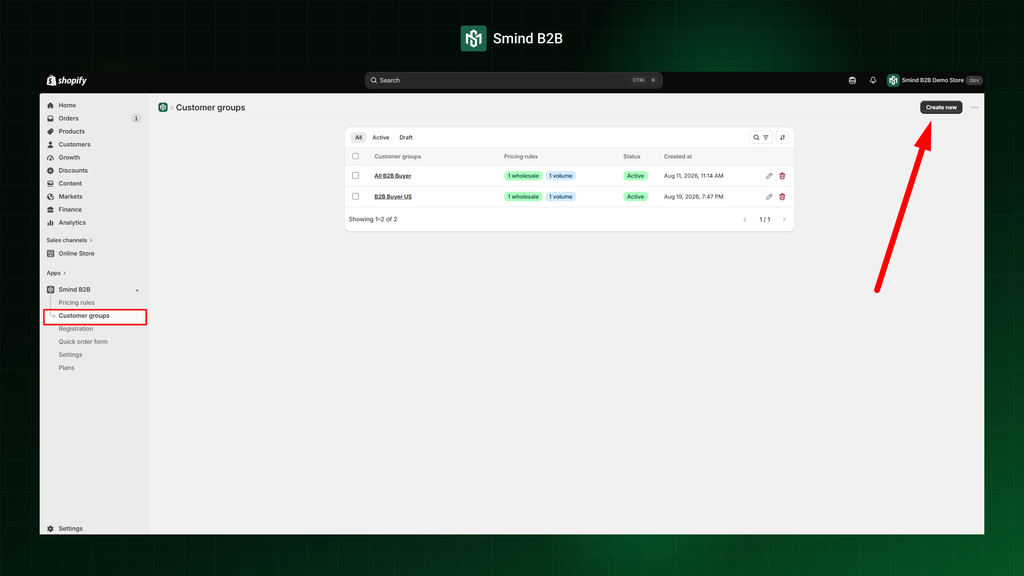
Step 1: Create new Customer Group
- Go to Apps > Smind B2B.
- Click Customer group in the sidebar.
- Click Create new then follow those steps
Step 2: Configuring customer group
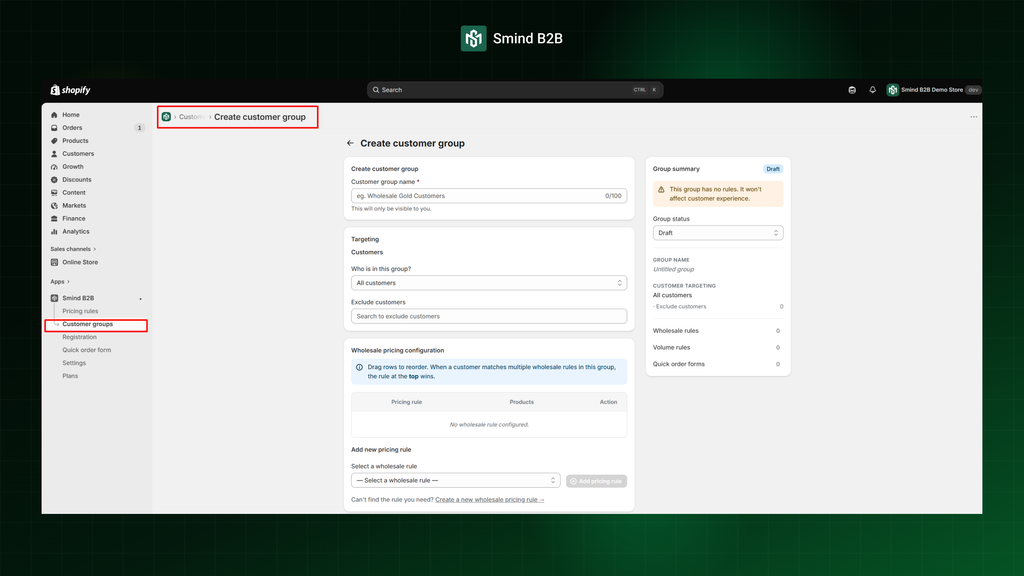
2.1. Customer group name
Enter a name for your reference, such as “Wholesale Gold Customers”.
2.2. Targeting
Each group supports one of five targeting scopes.
- All customers: Everyone, including guests
- Logged-in customers: Any customer with an account who signed in
- Guest customers: Visitors who are not logged in
- Specific customer tags: Customers with specigic Shopify tags
- Specific customers: Specific customer accounts
“Specific customer tags” is the most common scope for B2B, it integrates naturally with the registration approval flow, where approving a customer assigns tags that automatically place them in the matching group.
2.3. Assign Pricing Rule
To apply your pricing rules to this specific customer group, follow the steps below:
- Locate the Pricing Configuration section on the page, such as Wholesale pricing configuration
- Click the dropdown menu directly under Add New Pricing Rule.
- Select the 1st wholesale pricing rule you wish to apply to this group (for example, “B2B Standard 20% Off“).
- Click the Add Pricing Rule button to finalize and link the rule to this group.
Note: Multiple active pricing rules can be linked to the same customer group for layered pricing strategies. These rules follow a drag-and-drop priority format; if two rules apply to the same product, the higher one on the list takes precedence..
Do the same for Volume pricing configuration if you want to attach a volume pricing rule to this customer group.
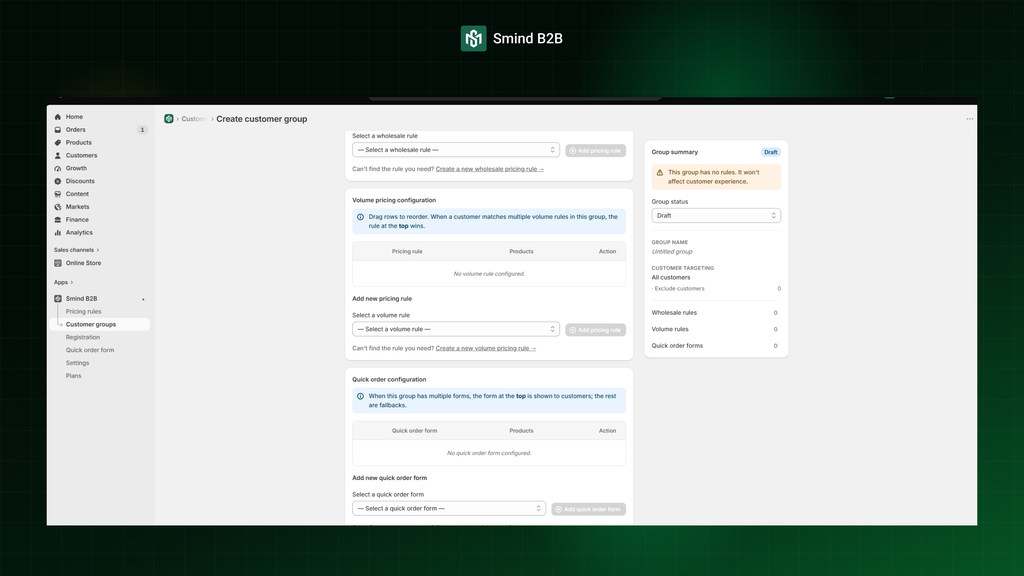
Step 3: Activate and save the Customer group
- Under Group summary, change the Group Status dropdown from Draft to Active
- Click the Save button in the top right corner
- You will see a confirmation message: “Customer group created”
The right side of the form also shows a summary of the group: how many rules are attached, the targeting scope, and the current status and group name
- Active: The group is live. Attached rules are actively applied to matching customers on the storefront.
- Draft: The group is saved but not live. Attached rules exist but are not applied to anyone.